What are Assistants?
Assistants in BusinessGPT are configurable AI profiles optimized for specific use cases. They combine various components such as knowledge bases, system prompts, and features to create a specialized AI that is precisely tailored to your needs.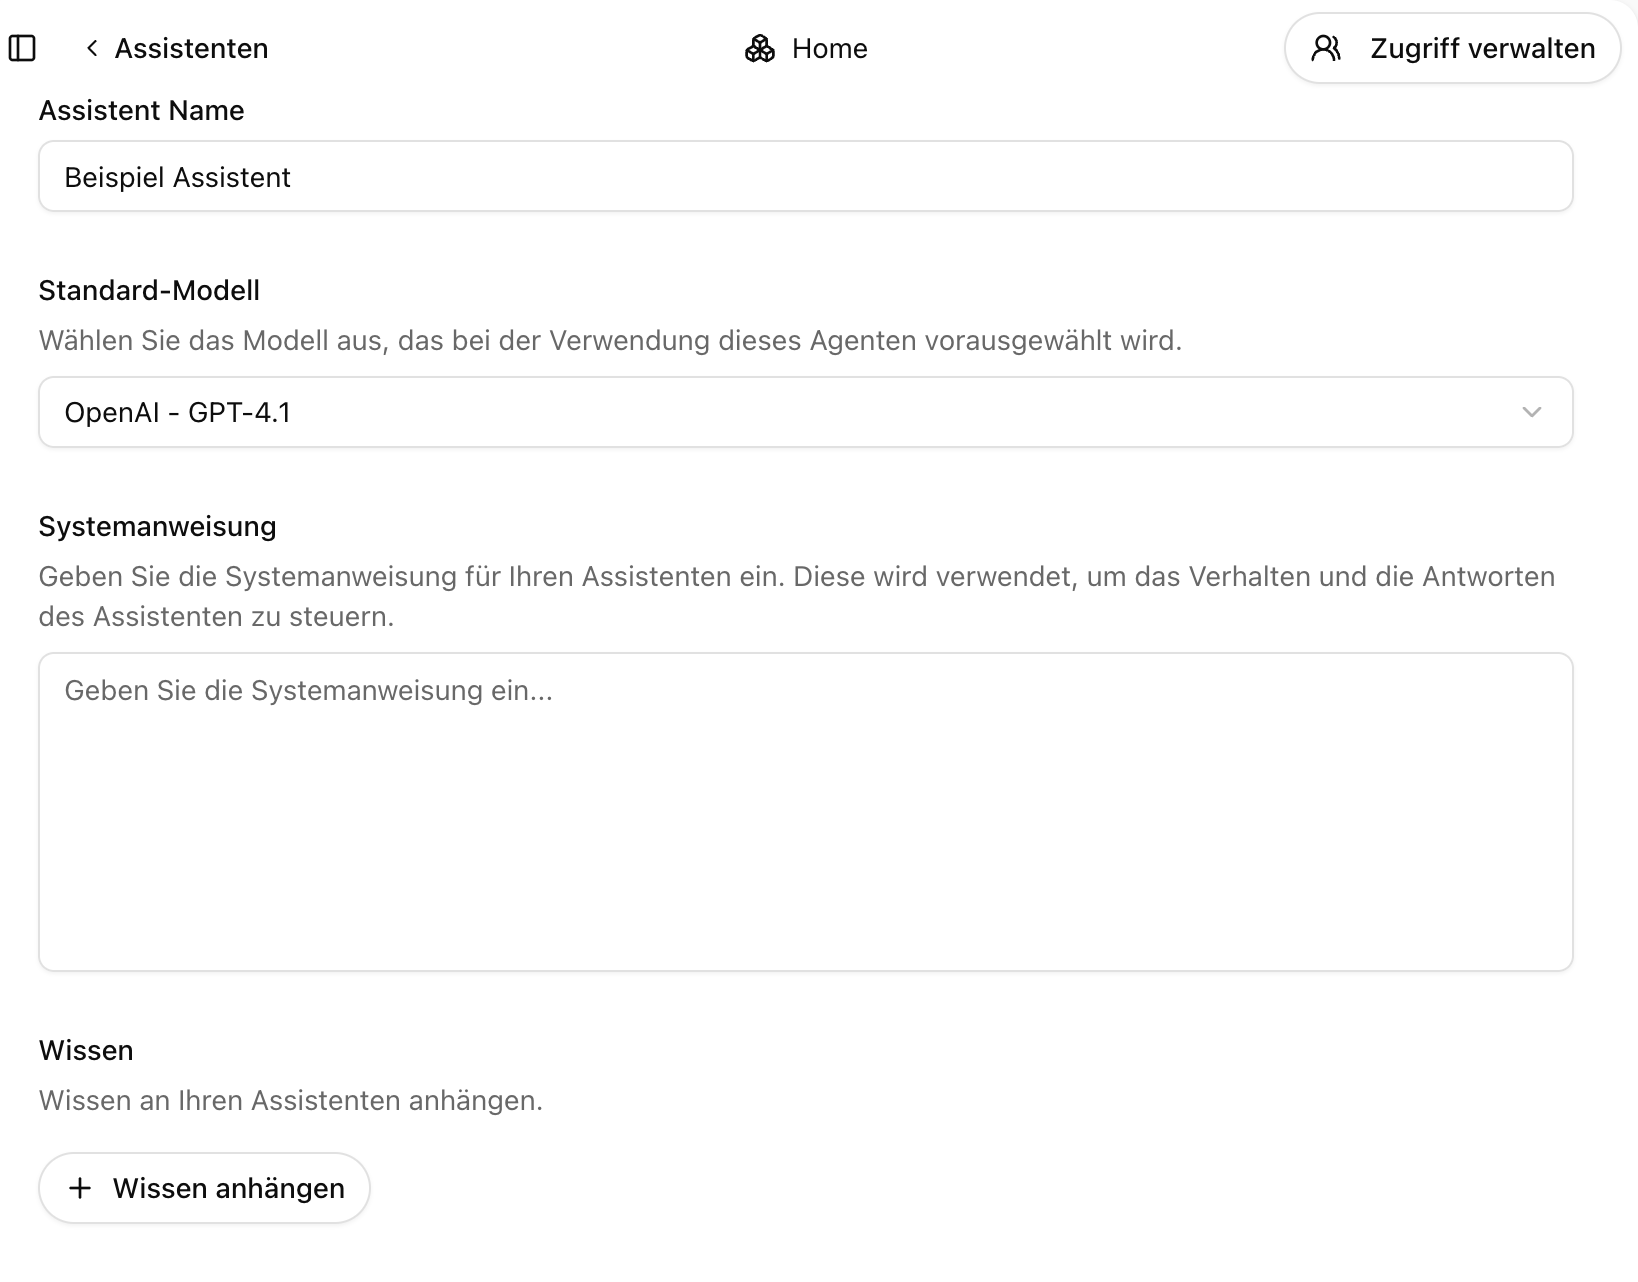
Main Features
Customizable Configuration
- Create customized assistants for different business areas
- Choose the optimal AI model for your specific use case
- Combine multiple knowledge bases for comprehensive information sources
- Define specific system prompts for consistent interactions
- Enable predefined features like memory or web search
- Save configurations for reuse and sharing
Integrated Components
- Knowledge Bases: Include one or more knowledge bases to give the assistant access to specific document collections
- System Prompts: Define prompts that control the assistant’s behavior and responses
- Memory Feature: Enable the memory feature so the assistant can consider conversation histories
- Web Search: Integrate web search to give the assistant access to current online information
Collaborative Sharing
- Share assistants with team members
- Set access permissions for different users via the rights-roles concept
- Standardize AI interactions within teams or departments
- Promote best practices through shared assistant configurations
How to Use Assistants
Creating a New Assistant
- Navigate to the “Assistants” section in the side menu
- Click the ”+” symbol to create a new assistant
- Enter a meaningful name in the “Assistant Name” field
- Optionally, add a description in the “Description” field
- Configure the components of your assistant (see below)
- Click “Create” to save your new assistant
Configuring Assistant Components
-
Select Model:
- Choose the optimal AI model for your use case from the dropdown list
- Different models offer different strengths (e.g., GPT-4o for complex tasks, Claude for nuanced text processing)
- The selected model determines the performance characteristics of your assistant
-
Add Knowledge Bases:
- Select one or more knowledge bases from the dropdown list
- The selected knowledge bases will be used as knowledge sources for the assistant
-
Define System Prompts:
- Enter specific prompts that control the assistant’s behavior
- Define the role, tone, and focus of the assistant
- Specify how the assistant should respond to certain requests
-
Enable Features:
- Enable or disable the memory feature
- Enable or disable web search
- Configure other available features as needed
Using an Assistant
- Navigate to the “Assistants” section in the side menu
- Select the desired assistant from the list
- Click “Start” to begin a new chat session with this assistant
- Interact with the assistant, which now works according to your configuration
Pinning Assistants for Quick Access
You can pin frequently used assistants for quick access:-
Pin Assistant:
- Click the pin icon next to the assistant in the assistants list
- Pinned assistants appear in the chat interface for direct access
-
Direct Access in Chat:
- Pinned assistants are directly available in the chat interface
- Click the desired assistant to immediately start a new session
- This enables quick switching between different specialized assistants
Sharing an Assistant
- Open the assistant you want to share
- Click “Manage Access”
- Enter the names or email addresses of colleagues who should have access
- Set appropriate permissions for each user via the rights-roles concept
- Save your sharing settings
Best Practices
For optimal results with assistants:- Create focused assistants for specific use cases or departments
- Combine relevant knowledge bases for comprehensive information sources
- Formulate clear system prompts that define the desired behavior
- Only enable needed features to maximize efficiency
- Test your assistants with typical requests before sharing them
- Update assistants regularly as requirements change
Example Use Cases
Customer Service Assistant
Customer Service Assistant
Configure an assistant with access to product manuals and FAQs in the knowledge base. Define system prompts for a helpful, solution-oriented tone and enable web search for current product information. This assistant can help customer service representatives respond quickly and accurately to customer inquiries.
Research Assistant
Research Assistant
Create an assistant with access to research reports, market analyses, and industry data. Define system prompts for detailed, analytical responses and enable both the memory feature and web search. This assistant can support research teams in analyzing trends, comparing data, and creating reports.
Onboarding Assistant
Onboarding Assistant
Configure an assistant with access to company policies, process documentation, and training materials. Define system prompts for a friendly, educational approach and enable the memory feature for context-aware help. This assistant can help new employees get up to speed faster and find answers to common questions.
Next Steps
After understanding the assistants feature, discover how BusinessGPT can help you with:Knowledge Base
Learn how to organize documents and use them as knowledge sources for your assistants
Memory
Learn how the memory feature helps your assistants consider conversation histories
Prompt Libraries
Learn how to create and manage prompts that can be used with your assistants